Microphones for Live Streaming 101

Microphones for live streaming 101

Whether you’re leading a webinar, streaming your latest passion project, or recording a podcast, your microphone will often make or break the experience. Good, clear audio not only sounds more professional, it also keeps your audience engaged. On the other hand, bad audio or a poorly chosen location leads to frustration and distraction, no matter how compelling your content or how fancy your backdrop is. Thankfully you don’t need a recording studio to sound great, you just need to understand the basics.


1. Understanding How Microphones Work

At its core, a microphone is a device that transforms sound waves into electrical signals that can be amplified, recorded, or transmitted. This simple concept is what allows your voice to travel clearly across a stage, or into a livestream or a virtual meeting platform.

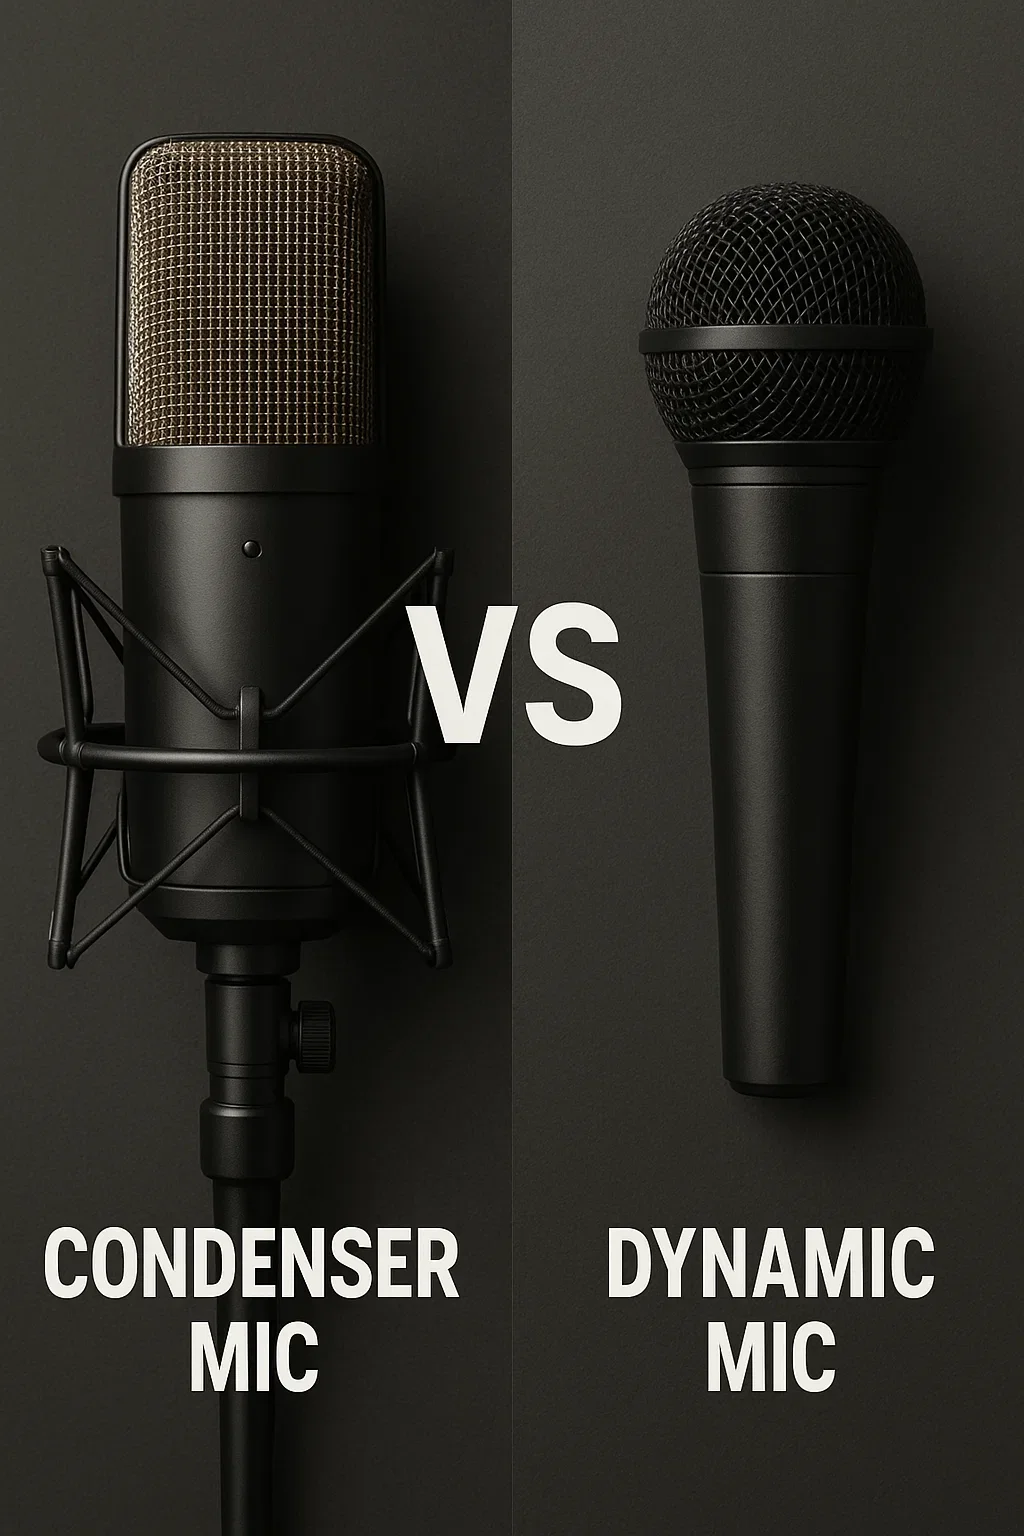
There are two main categories of microphones you’ll encounter: dynamic microphones and condenser microphones.

Dynamic Microphones – Rugged, durable, and great at rejecting background noise. Perfect for live settings and streaming from less-than-ideal rooms.

Condenser Microphones – Sensitive and detailed, capturing a fuller sound. Ideal for controlled studio environments, but they can also pick up small, unwanted noises like typing, HVAC systems, or background chatter.

Knowing this distinction helps you match your microphone to your environment. If you’re recording in a quiet, controlled space, a condenser might bring out the richness of your voice. If you’re working in a more unpredictable setting, a dynamic mic may be the more reliable choice.

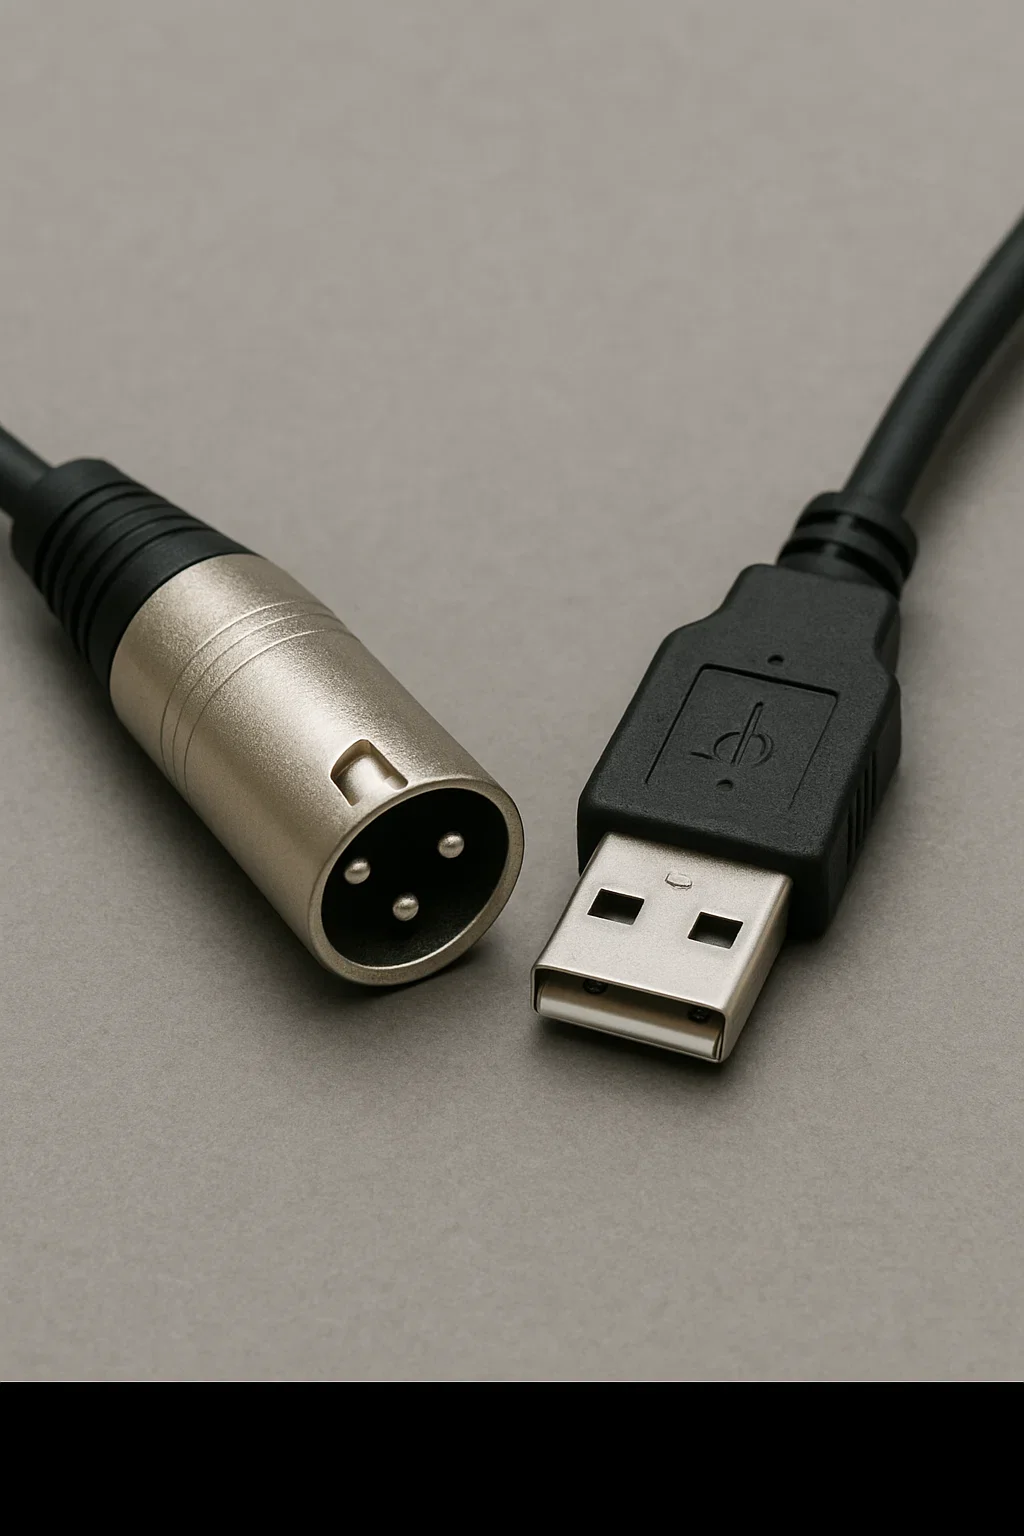
How your microphone connects to your setup is also just as important to keep in mind:

USB microphones plug directly into your computer and are instantly recognized by software like Zoom, Teams, Meet. They’re easy to use, affordable, and a great option for beginners or anyone who wants a quick upgrade from a built-in mic.

XLR microphones are the professional standard. They deliver high-quality sound and durability but require extra gear—like an audio interface or mixer—to connect to your computer. They’re more flexible and powerful but also more complex and costly.

2. Common Microphone Options for Livestreaming and Virtual Presentations

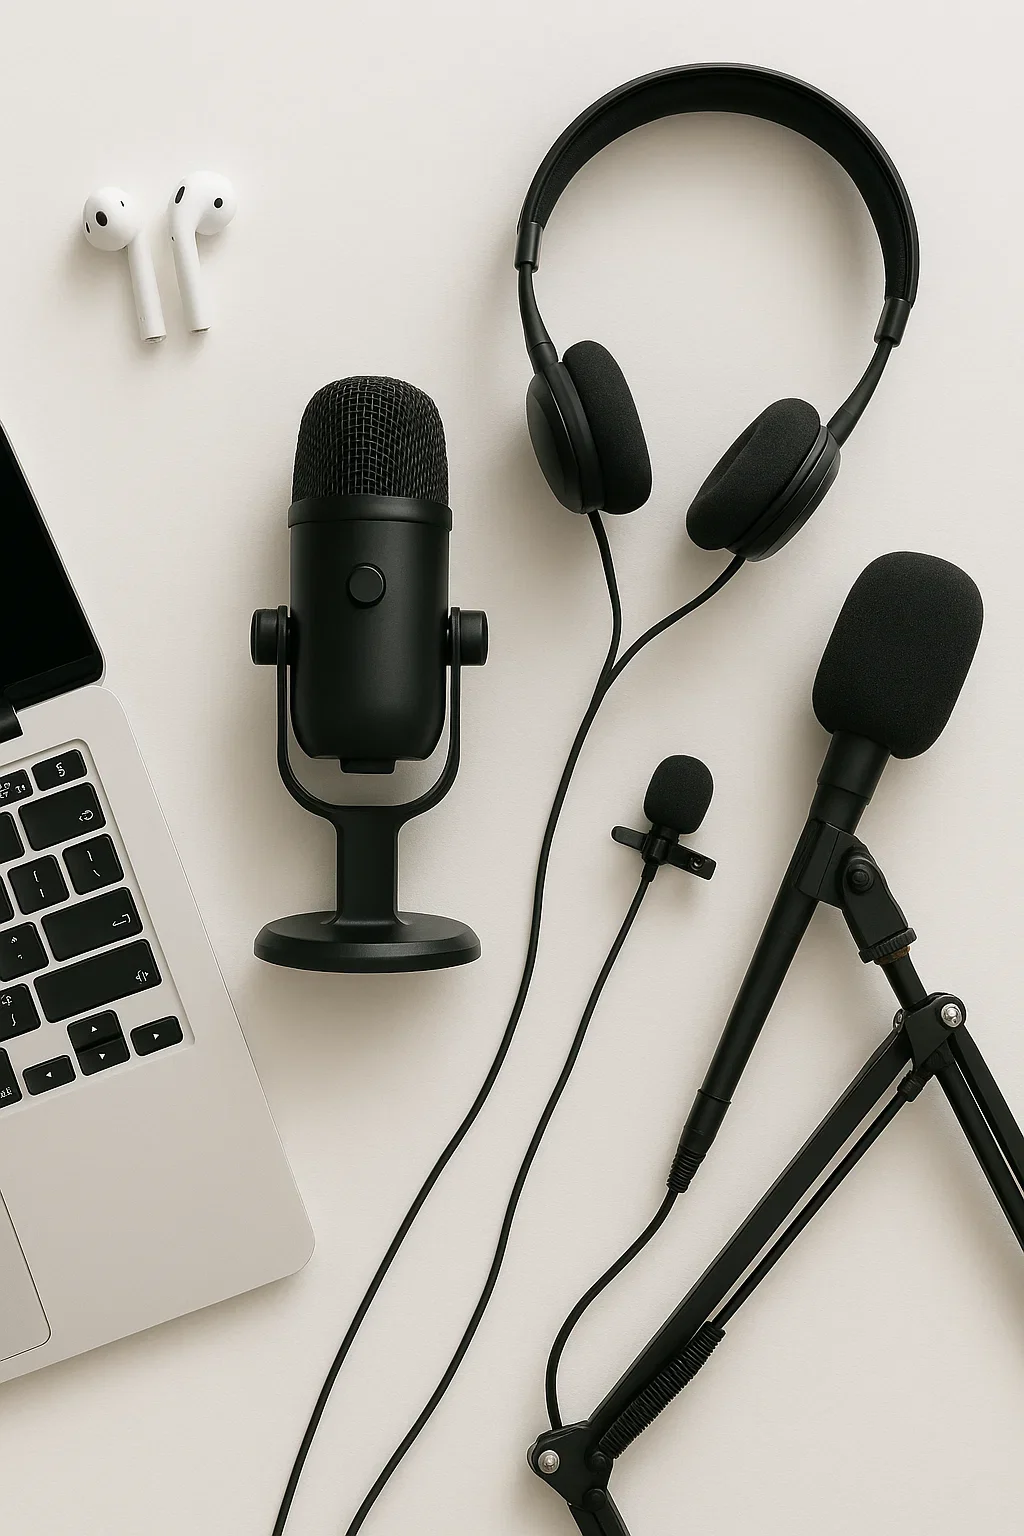
Most livestream setups aren’t going to include professional studio microphones out of the gate, and many presenters rely on what they already own. Each option has benefits and drawbacks, and understanding them can help you decide whether to stick with what you have or invest in something more specialized.

Let’s take a quick tour of the most commonly used options, starting with the simplest:

Built-In Computer Microphones
Every laptop or desktop comes with a built-in microphone, and while this makes livestreaming possible without extra gear, it’s generally the weakest option. Built-in mics tend to pick up significant room noise and create a distant, echo-filled sound.

They’re serviceable for internal calls but should be avoided for important presentations or recordings where clarity and professionalism matter.

Wireless Earbuds
Wireless earbuds like AirPods have become common for quick meetings and livestreams. They offer convenience, freedom of movement, and built-in noise reduction features. However, they’re not designed primarily for professional audio - the sound can be thin, and connection dropouts or battery life can become an issue during longer sessions. They work well for casual use but may not deliver the level of polish needed for formal presentations or recorded content. As a general rule of thumb, a wired connection will always produce better quality sound than a microphone connected via Bluetooth.

Headset Microphones
Headsets remain one of the most reliable choices for livestreaming and video calls. Because the microphone is adjustable and positioned close to your mouth, it delivers consistent sound even if you move your head or shift positions. This makes them ideal for interactive sessions where you’re actively presenting, teaching, or gaming. The main drawback is that headsets are very visible on camera, and depending on the model, audio quality may lean more towards functional for work use instead of crystal clear studio-grade.

Dynamic Vocal Microphones (Podcast Style)
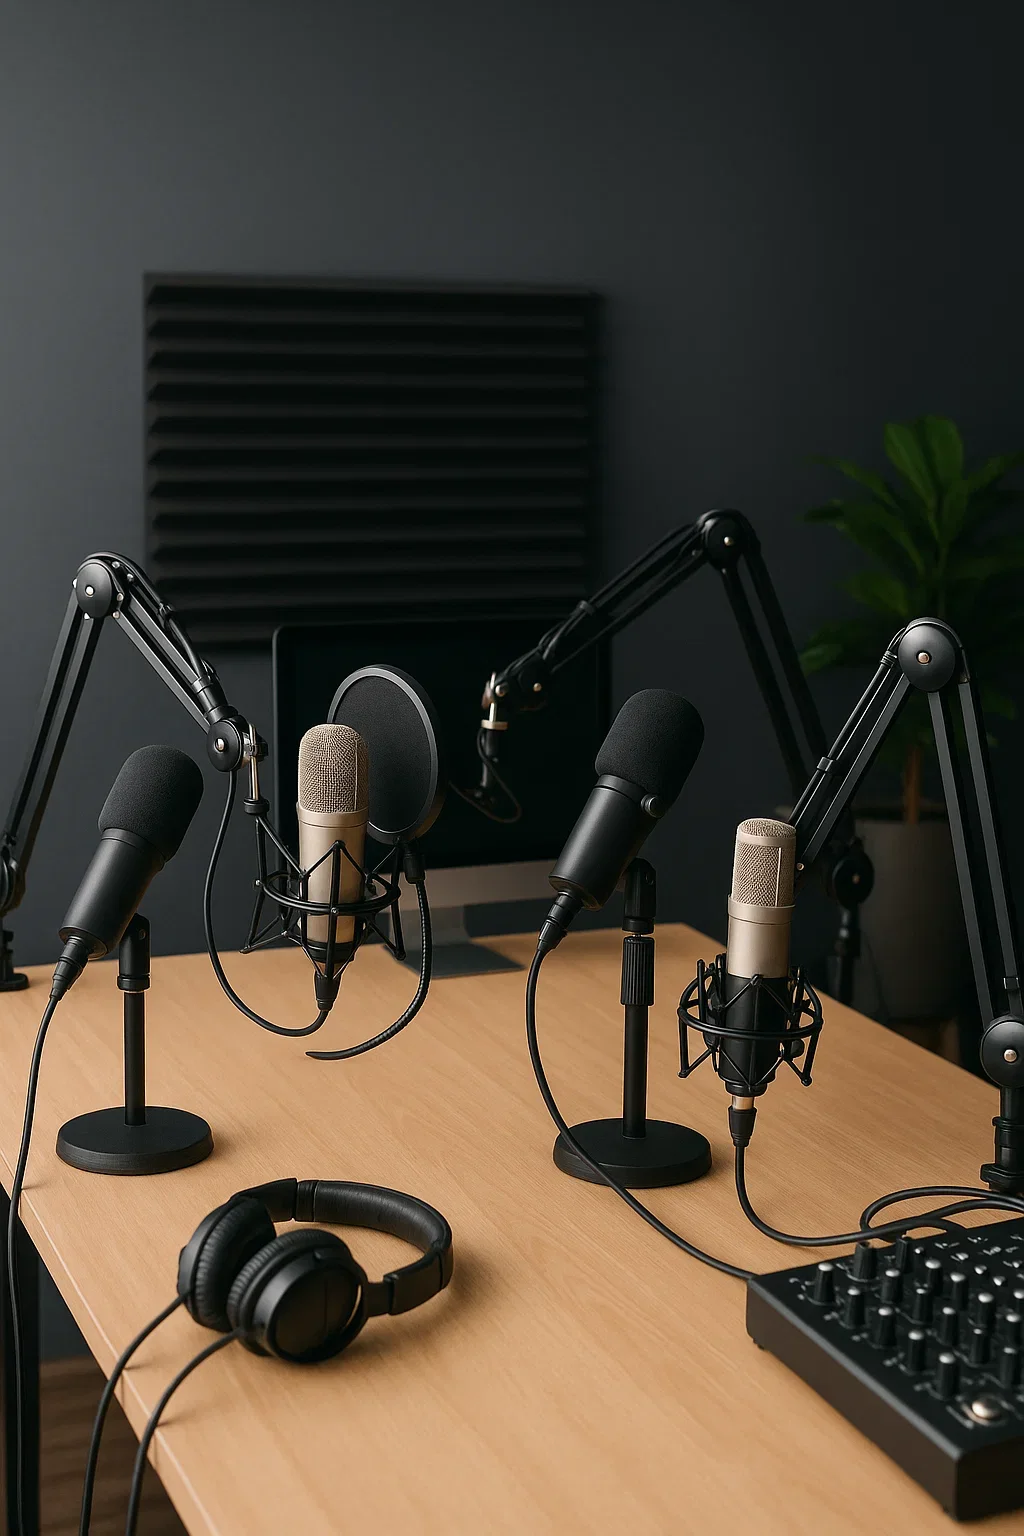
These are the go-to choice for podcasters and serious livestreamers. Dynamic vocal mics isolate your voice extremely well, reduce background noise, and give a polished sound, even in untreated rooms. The only tradeoff is that they’re usually visible on camera and require consistent placement close to your mouth.

Lavalier (Clip-On) Microphones
Lavaliers remain a solid choice for livestreams where you want a hands-free, unobtrusive setup. They keep your voice consistent, even as you move around, but can pick up clothing rustle if placed incorrectly or lack the depth you hear with larger mics. They’re a good solution for live presentations with multiple speakers, or for anyone prioritizing freedom of movement with a microphone that’s barely noticeable on camera.

Handheld Microphones
Handhelds are great for direct, controlled sound, especially when you want reliability and durability. They’re less convenient for livestreams that require hands-free interaction, but for interview formats or on-camera speaking, they’re a dependable option.

Boom Microphones
Booms mounted just out of frame above the presenter are popular in higher-production livestreams. They provide natural, camera-friendly sound and are hidden from the camera view, but need careful placement, testing, and a quiet, controlled space to truly shine.

3. How Streaming Software Enhances (and Limits) Your Sound

Modern conferencing and streaming platforms such as Zoom, Microsoft Teams, and Google Meet include built-in audio processing features. These options include background noise suppression, automatic volume adjustments, and echo cancellation. While these tools are helpful for tweaking your audio quality, they unfortunately are not replacements for a good microphone or a well-prepared environment.

For example, noise suppression may reduce the sound of typing or an air conditioner, but it also changes and modifies the natural quality of your voice. Automatic gain control can raise the volume when you speak softly, but it may also amplify unwanted background sounds. These features should be seen as supportive tools, not as primary solutions.

Software can improve good audio but can’t fully fix bad mic placement or a room that sounds like an echo chamber. Garbage in, garbage out still applies, and a poor-quality mic will always limit your audio, no matter how many fancy options your software has.

4. Setting Up Your Room For Success

Your room plays just as much of a role in your audio quality as your microphone, and while you don’t need to build a home studio, a few adjustments make a world of difference:

  • Hard, bare surfaces create echoes and reverb that can be difficult to remove once recorded. Try to avoid setting up in empty, large rooms with high ceilings and hard materials that bounce your sound back at you.

  • Softer surfaces and materials absorb sound and produces a clearer, more direct result. A room with carpets, curtains and couches will help reduce echo in your recordings, similar to how professional sound dampening panels work.

  • Position your microphone close enough to capture your voice clearly, but not so close that it picks up breathing sounds or causes distortion. Experiment with distance angles to reduce “pops” from plosive sounds like “p” and “b.”

  • Always test your setup before joining a preconference or going live. Record a short clip of your voice and play it back to hear what your audience will experience. Small adjustments in placement or environment can make a noticeable difference in sound quality.

5. What Post-Production Can and Can’t Fix

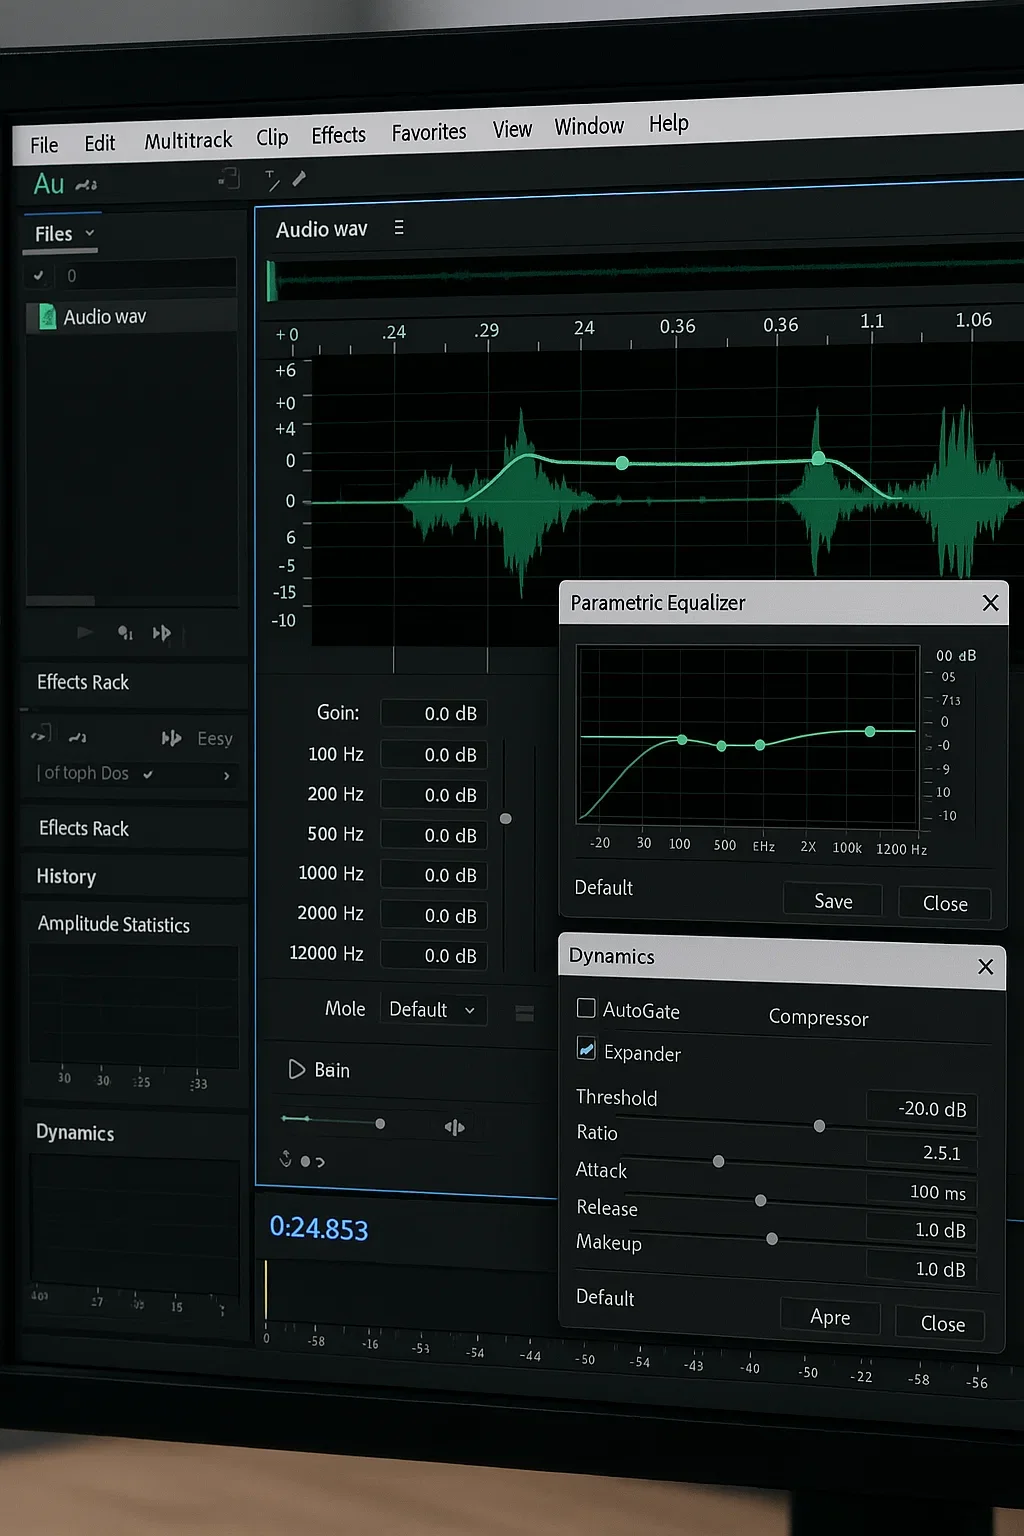
It’s tempting to think editing software can rescue poor audio, but this is rarely the case. Post-production can clean up minor issues such as background hiss or a low hum, but it cannot remove heavy reverb, distortion, or clipping (when the audio signal is too loud and “crunches”).

Reverb, for example, is the echo that occurs when sound bounces off hard surfaces. Once it’s recorded, editing tools can only reduce it slightly, not eliminate it. Distortion from speaking too loudly into a microphone permanently damages the recording and cannot be repaired.

If recovery is more important than perfection, there are some AI tools that can improve seriously damaged or difficult to hear audio back to an acceptable level. dxRevive from Accentize is a plugin we can recommend when all else fails, and while it won’t create miracles, it can make the difference between an unuseable recording and good enough.

Even with filters and plugins at your fingertips, it’s always crucial to prioritize strong internet and microphone quality at the setup and recording stage. Good audio captured at the source will always save time, frustration, and ensure your audience remains engaged and attentive instead of distracted and tuning out.


In the end, sounding good online isn’t about fancy setups or buying the latest and greatest gear, it’s about being clear, consistent, and prepared. A little knowledge about microphones and the best way to configure what you already have goes a long way towards producing professional sounding livestreams, virtual presentations, or podcasts.

At Revent, we believe that when your audience can hear you without distractions, your message truly shines. And working with a trusted partner who can fine tune a setup or ship out kits with recommended equipment doesn’t hurt as well. Whether you’re hosting a global conference or just kicking off a team meeting, feel free to send us a message and start a conversation to ensure you always look and sound your best.

Incorporating AI into Live and Virtual Events

Incorporating AI Into Live and Virtual Events Blog Post

AI has officially entered the event chat—and no, we don’t mean clunky robots roaming your conference floor (yet). But we’re big fans of any tech that actually helps the people behind it shine. From immersive livestreams that adapt in real time to fully customized virtual conferences and productions, artificial intelligence has the potential to reshape how we plan, produce, edit and personalize experiences. But what does “using AI in events” really mean?

At Revent, we often work with customers who are relatively new to AI and not quite sure where to start. So here are a few real-world ways you can use AI today to upgrade your events without breaking your brain or budget, along with tools to try and tips to keep things human. Because nothing kills good vibes faster than a chatbot that calls your VIP speaker by the wrong name.

1. Let ChatGPT Power a Smarter Event Assistant

Say goodbye to repetitive attendee emails like “What time does the keynote start?” and “Where’s the coffee?” AI tools like ChatGPT (via OpenAI API or through platforms like Intercom, HubSpot, or Tidio) can be trained on your event FAQs, schedule, speaker bios, and even venue maps to answer real-time questions in a natural, conversational tone on your website, in your app, or even in a Zoom chat. It’s a great tool for first line support, and will free up your staff to focus on the more difficult questions and pressing issues.

⚡Use Case: Set up a chatbot on your event website or app that handles logistics questions ("Where’s parking?" or "What time is the fireside chat?") so your team can focus on the curveballs.

💡Helpful Tip: Don’t just drop a generic chatbot in and hope for the best. Use your own content to train it, and always test thoroughly, especially if it’s answering attendee questions or interacting on livestream platforms like YouTube or Twitch.

2. Sora + Scripting = Video Magic for Short-Form Content

Creating compelling video content doesn’t always require long hours in the weeds of video editing software (but hey, that’s what we’re here for). Just need a quick promo video or session recap? AI video tools like Sora, a text-to-video generator in active development, and similar programs such as Runway, Synthesia, or Pictory can take a written prompt and turn it into a visual asset. While it can seem like magic, just don’t expect it to generate a virtual copy of your CEO or replicate every detail of your style guide—yet.

⚡Use Case: Let’s say you need a teaser video for your hybrid conference. Instead of scrambling to shoot B-roll, you can use AI tools to generate clips based on a script or create an animated explainer video for navigating your event platform.

💡Helpful Tip: These tools are great for early-stage concepts, placeholder visuals, and short-form marketing content, but they’re not quite ready to replace live footage or professional edits. Use them for speed and ideation, not your main stage sizzle reel.

3. Create Personalized Experiences with AI-Powered Platforms

There are no shortage of options when it comes to choosing a virtual event platform, and AI powered personalization features can be a meaningful differentiator when choosing your event home. Platforms like Swapcard, Brella, or Grip use machine learning to recommend which sessions to attend based on interests, suggest networking matches or even adjust closed captioning to suit individual learning styles, while also adapting in real time as it takes in new information. It’s like browsing Netflix, but for conferences.

⚡Use Case: During a multi-day virtual summit, attendees get customized agendas and meetups based on their job title, past sessions viewed, selected keywords or questions they ask in chats.

💡Helpful Tip: Be transparent. Let users know their preferences are being used to improve their experience, not sold to the highest bidder. Also, give people a way to opt out or reset recommendations if they feel too boxed in.

4. Predictive Analytics for Smarter Planning and Post-Event Insights

AI doesn’t just help during the event—it can shine before and after, too. Using predictive analytics, AI tools can sift through past registration data, social trends, and even email click-throughs to help you figure out what’s going to work next time. Tools like Hubilo, Bizzabo, and Google Analytics with AI-powered insights help you predict attendance trends, ideal session times, and high-interest topics before you finalize the agenda.

⚡Use Case: You can run predictive models to forecast which marketing emails will convert best, which session titles will boost signups, or which speakers are likely to drive the most engagement based on past data.

💡Helpful Tip: AI insights are just that—insights. Use them as a guide, not gospel. Combine data with your on-the-ground experience and knowledge of your audience to make the final call.

5. Make Your Event More Accessible with AI Transcription and Voice Tools

Want to reach an even broader audience and enhance your event’s inclusivity? AI-powered transcription and text-to-speech tools like Otter.ai, Descript, Trint, and ElevenLabs makes it easier than ever to enhance the way guests can watch and review their sessions. With their help you can caption livestreams or create transcripts in real time, turn spoken content into searchable text, or even generate human-like voiceovers with just a few clicks.

⚡Use Case: Livestream a keynote and automatically generate live captions. After the event, offer downloadable transcripts for SEO or accessibility, or use AI voice tools to produce multilingual audio recaps.

💡Helpful Tip: Choose tools that support custom vocabulary, especially for names, acronyms, or industry-specific terms, to avoid awkward mispronunciations. And don’t forget to proofread auto-transcripts before publishing, just to be sure the machines did their job right.

6. Turn Hours Into Highlights For Your Social Media Posts

You crushed your event. But now you’ve got hours (and hours) of footage sitting on a hard drive and your social team is already asking, “Can we get some clips for Instagram by tomorrow?” Luckily, you don’t need to camp out in your editing suite all night anymore to make that happen.

AI-powered editing tools like Veed.io, Wisecut, Opus Clip, and Munch use machine learning to automatically detect highlight moments based on engagement cues like speech tone, facial expression, and keyword emphasis. Then once you’re happy with the content, they frame, cut, caption, and resize them for your favorite platforms. Instagram Reels, TikTok, LinkedIn, YouTube Shorts—it’ll handle them all, in far less time it would take to create each clip individually.

⚡Use Case: Upload your full session recording, select your preferred vibe (motivational, educational, punchy, etc.), and let the platform do its thing. In a few minutes, you’ll have multiple clips to review without lifting a single editing finger.

💡Helpful Tip: AI can have run into trouble with niche jokes and inside references, so always give final clips a human once-over or generate more options if you aren’t happy with the initial results. Also utilize any branding presets available (logos, fonts, lower thirds) so your clips still feel on-brand and polished.

and finally…

Don’t Let AI Run the Whole Show—Know Its Limits!

AI is a powerful tool for crunching numbers, creating content out of thin air, and speeding up repetitive tasks, but it doesn’t always understand nuance or context, and may even force itself to provide definitive answers that don’t exist instead of simply saying “I don’t know.” Over-relying on it can lead to robotic content, incorrect information, misfires in guest communication, and even trust issues if you don’t disclose how you’re using it.

For example, a fully AI-generated event agenda might sound efficient, but it could result in sessions that lack thematic cohesion, contain minor errors, or feature speakers and sessions that don’t serve your specific event goals. As a rule of thumb, utilize AI driven tools to assist, not to automate. Try to be as descriptive as possible when prompting, refine your results, and always review what you generate, from session titles to on-screen graphics, to make sure nothing inhuman falls through the cracks.

So… What’s Next?

To start growing more comfortable with what these tools can do for you, a good suggestion is getting some hands on experience with any recently added AI features in the applications you’re already using and familiar with. Zoom, Microsoft 365, Google Workspace and Adobe Creative Suite have all introduced powerful new capabilities that are worth playing around in. But success starts with using these tools intentionally, with real goals and thoughtful design behind them.

AI isn’t just a trend, it’s quickly becoming a foundational tool across the event industry. And as the technology continues to improve, its potential for impact grows as well. At Revent, we’re helping clients navigate this new frontier by blending the benefits of AI with the creativity, polish, and expertise that planners, staff, presenters and producers bring to the table.

Want to explore how AI can fit into your next production? 👉 Let’s talk about custom solutions for integrating smart tools into your event workflow—without losing the human magic.

Top 5 Virtual Event Platforms for 2025

If there were an Olympic sport for trying virtual event platforms, we would have at least a bronze. Maybe silver, if coffee counts as performance-enhancing. After years of livestreaming, consulting, and seeing the back end of more platforms than we care to admit, here are our are top 5 picks for 2025—with everything you actually want to know!

1. Accelevents

One of our go-to’s, Accelevents is flexible, scalable, and surprisingly easy to use—like the friend who actually shows up on time and brings snacks. Bonus points for robust integrations and clean design.

💰 Cost: $8,000+ per event
✅ Pros: Easy to use, great for hybrid events, strong analytics
🎯 Best For: Mid-sized virtual or hybrid conferences where flexibility is key

2. Zoom Events

We all know this one… but who doesn’t love a familiar surrounding, and it’s also full of features that stretch far beyond your weekly team syncs. Just make sure you explore the Events side—it’s like discovering your mild-mannered coworker moonlights as a DJ.

💰 Cost: $1,490 /year license + usage fees (based on attendees)
✅ Pros: Familiar, reliable, scalable, strong support
🎯 Best For: Webinars, multi-session events, or when you just want something that works

3. Remo

If you really love tables… well Remo is the place to be! Remo’s virtual table layout works well for smaller events and networking-focused meetups. It’s like a digital cocktail party, minus the sore feet.

💰 Cost: $699+ per event or monthly plans from $299/month
✅ Pros: Interactive virtual tables, great for small groups, fun UI
🎯 Best For: Workshops, networking sessions, or virtual team-building events

 4. On24

The data powerhouse and one of the OG’s in this space. On24 is built for lead generation, content hubs, and big-business webinars. Slick, professional, and kind of obsessed with analytics—but in the best way.

💰 Cost: Starts around $39,000/year
✅ Pros: Enterprise-level data, content hubs, post-event analytics
🎯 Best For: Lead gen, B2B marketing events, and corporate webinar series

5. Webinar.net

Simple, scalable, and surprisingly powerful. Webinar.net is built for marketers who want clean branding, ease of use, and zero technical tantrums. Great for high-volume webinars and those “we need this to just work” moments.

💰 Cost: $6,000+ per year
✅ Pros: Clean interface, solid for large-scale webinars, no downloads needed
🎯 Best For: High-volume, professional webinars with minimal fuss

Top 5 Virtual Event Platforms


There’s no perfect virtual event platform—only the one that’s perfect for your event. Whether you need stunning visuals, airtight webinars, or networking magic, there’s a tool out there that won’t make your AV team cry.

Need help figuring out which one fits your goals and budget? That’s literally what we do at Revent Consulting. We’ve been there, streamed that.

Let’s plan a virtual (or hybrid!) event that actually feels like a real experience—minus the buffering and awkward silences.


From Script to Screen: 5 Key Tips for Crafting an Inspiring Nonprofit Mission Video

What’s the first thing that comes to your mind when you think “nonprofit mission video”? If you grew up in the 90’s Sarah McLachlan is probably playing and pictures of sick animals are flashing by. A compelling video has the power to inspire action, engage donors, and communicate the heart of your cause, however your message no longer needs to sit solely in sadness to make a large impact at your annual fundraiser. This can be a chance to tug at heartstrings, but more importantly, showcase the amazing stories from your organization, wow your audience, and create a positive call to action that will result in numerous generous donations (well, at least that’s the goal!).

Here are five essential tips to ensure your video is as powerful as it is unforgettable:

 1. Start with the Why

Before your camera crew arrives to start filming, it is always best to start with the storyboarding process. Define the core message of your video, identify the key interviewees that can bring a human side to your message, and plan out the visual sequence in a way that will best support your narrative. Skipping this vital step could leave you with a confusing, meandering mess, or deep in the editing weeds trying to make your content make sense.

For example, if your organization is a summer camp that financially supports underprivileged children through donations, focus on a few key recipients, capture their joy, what they’ve learned at camp, and what it means for their future. Interview not just the children, but also their counselors and their parents to capture the full spectrum of emotions and impact on the entire community. Use the mission video to shepherd your donors through a journey of joy that campers experience to truly showcase how their dollars will directly impact the community.

 2. Prioritize Authenticity

Authenticity is the key ingredient when it comes to nonprofit storytelling, and there’s no way to fake it. Use real people, real stories, and real moments to create a genuine connection with viewers. Avoid scripted dialogue (unless you want your subjects to sound like robots) and instead, film organic conversations to capture natural and heartfelt responses from those sharing their experiences. Raw emotional responses, from laughter to conviction to tears, will make your story real and personal for your subjects and your audience. One of our favorite ways to end videos is with the sound of laughter and joy, and here is a perfect example from one of our long-time clients Friendship Home:

  3. Use High-Quality Audio and Lighting

Ever been on a Facetime call with a toddler? It can make even the sweetest moments feel like a rollercoaster that never ends. No matter how powerful a message is, its impact can be lost if viewers are struggling to hear or see your content clearly. We recommend investing in a professional camera crew that will be able to capture crisp audio, multiple camera angles, and incorporate natural or soft lighting to ensure your subjects look their best. A great crew will also help you design your shots to amplify your messaging instead of distracting from it, whether it’s finding the right background, creating a sense of depth of field, or proactively preparing for painless shot matching and editing once the cameras stop rolling.

  4. Keep It Concise and Impactful

Attention spans are notoriously short at fundraiser events, especially when there’s wine and hors d’oeuvres involved. We find it best to keep your video between 2-5 minutes to maximize impact before the phones come out. Determine the most compelling aspects of your story early on, focus on highlighting those key points over trying to fit everything and everyone in, and use strong visuals to enhance the words of your interview subjects instead of separating them. A well-paced video with intentional editing keeps viewers engaged as you take them through an emotional journey: from the problem, to the solution (THAT’S YOU!) to the positive outcomes. Here is a video that we created for The Second Step, an amazing organization that does some incredibly hard work filled with even harder stories, while ending the video with a hope:

 5. End with a Clear Call to Action

What do you want your donors to do after watching? Whether it’s donating, volunteering, or sharing your message with others, make sure your call to action is clear and easy to follow. The person speaking directly following the video should refer back to the key messages of the video and directly launch into the ask, whether it’s a paddle raise or guests filling out a donation form online. Take hold of this momentum to direct your guests to an immediate action.

By following these five tips, your nonprofit mission video will be on the right path to effectively capture hearts, drive engagement, and inspire meaningful action for your important cause. Need help crafting a show-stopping video for your annual gala? Revent Consulting is here to guide you through the process. Let’s make your mission unforgettable!

The Roadmap to a Flawless Hybrid Corporate Town Hall

So, you’ve been tasked with planning a hybrid corporate town hall for your company. No pressure, right? Just seamlessly connect in-person attendees with virtual participants while making sure tech doesn’t betray you and everyone actually pays attention. Easy! (Deep breaths.) Let’s break it down into four key steps that will help you keep your sanity while pulling off an event that even the CEO will be impressed by.

1. Define Your Why (Before It Defines You)

Are you rallying the troops? Sharing big company updates? Celebrating a large milestone or team accomplishment? Defining the purpose of your town hall early on will guide all your decisions—from the agenda to the technical setup. Keep it clear, concise, and most importantly, aligned with what your employees actually care about (spoiler: they really want to know their jobs are secure and free snacks always help).

2. Tech Checks: Your Best Friend

If there’s one universal truth in hybrid events, it’s that technology will either make you look like an event genius or leave you questioning your life choices. Invest in a solid AV partner, ensure your platform supports real-time interaction, and for the love of all things digital, do test runs to not only test the technology at your live and remote locations, but also for your speakers to get comfortable ahead of time. Lastly, include your AV partner in pre-event discussions and don’t hesitate to ask for advice. They have seen a few things, and can be a great assist when planning for worst case scenarios, just in case the event gods do not grace you that day.

3. Engagement: It isn’t just for fun

Virtual attendees tuning in from their home or global offices truly need a reason to stay engaged beyond checking their emails in another tab. Use live polling, hold a live Q&A, and enable interactive elements to keep them involved (flying emojis are your friends!). And for the in-person audience? Keep the energy up with engaging speakers, great visuals, video clips, and maybe a strategically timed coffee break. No one ever complained about extra caffeine.

4. Replays & Recaps: Why stop the convo?

Once the celebration of a job well down winds down (or at least the last slide clicks through), make sure to provide a recording and key takeaways as soon as possible. Not only does this help those who couldn’t attend, but it also gives your messaging a longer shelf life. Bonus points if you create a highlight reel with the best moments and reactions — yes, even that accidental mute-button fail can be turned into a positive.

Final Thought: Hybrid Town Halls Don’t Have to Be Hard

Planning a hybrid town hall is a balancing act, but with the right prep, partners, tech, and engagement tactics, you’ll pull off an event that feels seamless no matter where they’re watching from. And hey, if all else fails, just make sure the Wi-Fi is strong and the coffee is flowing. You’ve got this!

Contact us today for an initial consultation at no cost to start planning your next Town Hall!